Food

How to Make Crepes

Crepe 1

I personally have always been a little afraid of making crepes. I think it goes back to a disastrous blackened, smokey kitchen, burned-to-the-pan experience I had at around age 17 after returning from a trip to France. I had seen them easily whipped up into paper thin, warm, delicious vessels of all of the very yummiest things like cheese, chocolate, and oozy fruit compote. And I thought, I can totally do this.

It turns out that I can, but there are a few things that I needed to mess up first before learning how to make it work on the stovetop in a frying pan without that very cool little wooden sweeper rake thing that the French swish around the griddle to make perfectly even, thin crepes. First of all, recipes always seem to call for a medium high heat to cook these over and that burns my butter immediately and turns my crepes into something more like giant flour based potato chips, instead of velvety soft envelopes for treats. So I use medium heat, and am poised to turn it down a bit if I notice things going south. My crepes certainly do not come out perfect looking, but they are very tasty and easy to whip up.

Crepe 4

For this morning’s breakfast (which, let’s face it, was really brunch because I didn’t really get rolling on making proper breakfast until around 11AM), I made crepes with a slice of swiss cheese thrown in and folded over on in the hot pan, and a pile of plain crepes that could be embellished however the person chowing down on them felt. There happened to be lemons and confectioner’s sugar already in the house, which is a classic flavoring for plain crepes and is absolutely delectable. This is a fun thing to make if you’re throwing a brunch, because it can be made much like a fancy, French, taco bar with a pile of crepes on a warm plate that you made ahead of time, and bowls of possible toppings ranging from sweet to savory (cheeses, fruit, nutella, maybe even smoked salmon??). Add in mimosas and you are officially a class act. (Or just actually serve tacos for brunch, that sounds like my kind of party 😉 )

The recipe below and here is adapted this recipe from Allrecipes.com, with a few slight changes and more notes on technique and details like how much butter to put in the pan, when to replenish to keep the crepes from sticking, but not drown them in butter, etc. Things that I learned the hard way, but you don’t have to!

Cat

{my crepe making audience}

Crepes

Ingredients:

2 eggs

1/2 cup milk

1/2 cup water

1 cup flour

 1/4 teaspoon salt

2 tablespoons butter, melted and cooled

Method:

1.  Whisk the eggs into the milk and water in a medium sized mixing bowl, preferably with a spout.

2.  Sift in the flour, or fluff it with a fork before forking it into the liquids. Basically, you’re trying to minimize lumps here. Whisk it all together thoroughly until relatively lump free.

3.  Whisk in salt and cooled melted butter (hot butter will cook the eggs).

4.  Heat a standard frying pan to medium. Give the batter one last whisk and then drop a small pat of butter into the hot pan. Whirl the butter around to coat the entire bottom of the pan and up the sides. Make sure you’re thorough with the butter or these things will stick!

5.  Pour about 1/4 cup of the batter into one side of the pan and immediately swirl around to coat the bottom. It’s ok if it’s a little lacy at the end of your swirl and doesn’t completely coat, the crepe will still taste good 🙂

6.  Cook for about a minute of so. When you see the edges starting to curl away from the pan, take the opportunity to slip a thin spatula in there to take a peek and see if the bottom is lightly browned. If it is, flip the crepe. I do this by tilting the pan almost completely perpendicular to the stove and pulling the crepe almost completely out onto the spatula and then popping it back in with the uncooked side down. This works because the crepes aren’t as heavy as classic American pancakes.

7.  Cook the opposite side for about a minute until lightly browned and then slide out onto a warm plate. If you are melting cheese into the crepe, put the cheese on top of it in the pan as soon as you flip it and melt for a minute before folding and then removing from the pan.

8.  Add a new pat of butter only when you need it. You can do at least a few crepes in between each re-buttering of the pan. They’ll be greasy and drowning in butter if you add a fresh pat in between each crepe.

Crepe 3

Pesto Pasta with Homemade Pesto

DSC_0139

If there’s one dish that always elicits an excited response when I say that I’m going to make it, it’s this one. It’s easy; this is not something that takes a tremendously long time, or requires any special technique or ingredients, really, to make. It’s homemade-tasting, because it IS homemade (unless you opt to use store bought pesto, which I’ll address in a bit, and is absolutely fine for this simple dish). I adore the pesto sauce poured over the (perfectly al dente!) pasta, the pastel green Easter-egg color is gorgeous and it manages to taste fresh and savory at the same time. It’s seriously flavorful, and did I mention fast??

Let’s dive into it; this post contains a recipe for homemade pesto, but as I mentioned before, there is no harm in using a little container of store bought pesto, especially if you don’t own a food processor or blender. The basic method is to make or buy pesto and then combine it with hot béchamel sauce that has been taken off the heat (you’re just warming up the pesto in its sauce base, basically. Any actual cooking of the pesto will take away the brightness of its herby, basil flavor. And we can’t have THAT). Then pour the now green sauce over al dente pasta of your choice. Serve it up, sprinkle with cheese, and enjoy!

See the full recipe for Pesto Pasta below and here, and see the recipe for Homemade Pesto below and here.


Homemade Pesto Recipe
Ingredients:
2 big handfuls of basil leaves (this does not need to be incredibly exact, it’s to your taste)
3 cloves garlic
1/2 cup pine nuts
1/2 cup olive oil plus additional as needed
Sea salt and black pepper to taste
1/2 cup finely grated parmesan and pecorino romano

Method:
1. Put all ingredients into a food processor or blender, then pulse until basil pieces are fine and combined.
2. Mix basil mixture with grated cheese and add additional olive oil as needed to get a smooth consistency. Pesto shouldn’t be runny, but shouldn’t be a thick paste either.

DSC_0123

Béchamel
Ingredients:
2 tbls unsalted butter
2 tbls flour
2 1/2 cups milk or cream

Method:
1. Melt butter over medium-low heat in a saucepan.
2. Add the flour and cook for about a minute, stirring constantly with a whisk (or a regular dinner fork if you don’t have a whisk) to prevent burning. You know it is ready for the liquid when the mixture doesn’t smell quite as “floury.”
3. After about a minute of constant stirring, add the milk or cream, about a cup at a time, and whisk into the flour/butter mixture until smooth. A trick for this is to use warm or hot milk as it absorbs faster. Be quick with the whisk, however, the flour will start to absorb the liquid very quickly if it is warm.
4. After all milk or cream has been added, stir over medium-low heat (maybe turn it a bit closer to medium at this stage) until it is a proper consistency for a sauce and coats the back of a spoon.
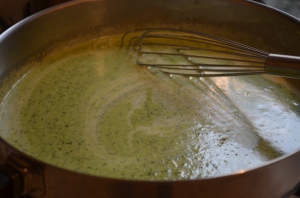
5. Remove the béchamel from the heat and stir in all of the pesto until it is a smooth, uniform light green.

Final Steps
Cook a 1 lb package of the pasta of your choosing to an al dente consistency (I used Barilla Thin Spaghetti) and drain. Pour the sauce over the drained pasta and toss the pasta until coated. Top with grated cheese and a twist of grated black pepper and serve.

DSC_0119

Slow Cooker Beef Burgundy

DSC_0038

A slow cooker is a wonderful thing. Anyone who has one knows the incredible feeling of coming home at the end of a long day to a place filled with intensely rich food smells, and a hot meal bubbling away in the kitchen already. I’ve been known to descend on the crock pot immediately, without removing pumps or tights first. It’s that irresistible.

Slow cookers have been around forever and as a result, there is a glut of recipes out there especially for them. I feel like this next statement should be in caps… not all slow cookers recipes are created equally. I have had some truly awful food that was cooked to death all day inside the crock pot (sometimes created by mine own hand, I’m ashamed to admit).

The trick is recipe selection. Tough cuts of meat are the best; they’re super cheap and stand up really well to the low and slow method. Also, they become mouth-wateringly buttery soft after getting the low and slow treatment. The other thing to think about is vegetable mixture. You will need to use a recipe that calls for vegetables that don’t fall apart or turn into mush when cooked all day. To use this beef burgundy recipe as an example, carrots can handle the long cook time, and strangely enough, so can mushrooms; they become melty and smooth and imbue the rest of the pot with their delicious meaty flavor.

Finally, everyone embarking on a delicious foray into the world of cooking with a slow cooker should know the cardinal rule. Don’t open the lid until the very end of the cooking time! The heat is so low, it takes forever for the pot to build up the heat lost from opening the lid.

Enjoy!

DSC_0035

Shaved Brussels Sprouts with Bacon and Vinaigrette

DSC_0024

I love Brussels spouts. I’m not ashamed, I’ll tell anyone, they are delicious. Truth be told, I only tried them for the first time within the past few years. I was a picky kid and I think that no one thought to try them on me; they probably would not have paired well with my plain spaghetti and butter anyway 🙂

I had some (OK, a lot, they looked so good in the grocery store that I went pretty wild bagging them) of leftover sprouts in my fridge from making a roasted Brussels sprouts side with a special Valentine’s Day filet mignon. I needed to use them up before they went to waste and I was craving a light dinner, so I made a Shaved Brussels Sprouts Salad with Bacon and Vinaigrette. Despite using just a few ingredients, this was complex tasting and very satisfying. Next time, I’ll buy Brussels sprouts especially for this dish!

Ingredient list:

Brussels sprouts
olive oil
salt
freshly ground black pepper
bacon
parmesan cheese for grating
good quality balsamic vinegar

How to Have Oysters at Home

DSC_0008

I went on the most delicious jaunt to Aquagrill the other week, but when the bill came and after I picked myself up off the floor from the sticker shock, I thought, why not do this at home? Yes, forgo the intimate restaurant experience, but really, what’s more intimate than the two of you cuddled up at home over something as luxurious and special as oysters?

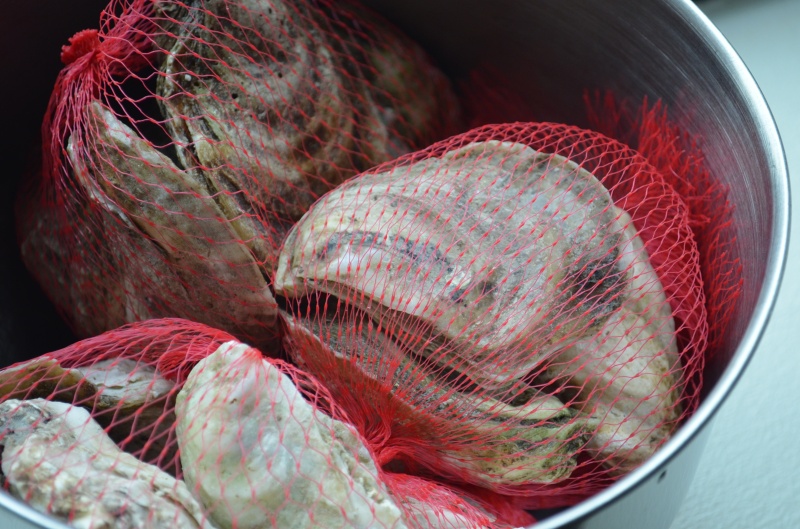
The sight of all the oysters gleaming on the plate reminded me of the piles of oysters that I walk past every week at Whole Foods. Now, I never gave those a second look before but this week I bee-lined for them and was delighted to find that they are half the price of the restaurant and from the same bays and coves. I bought a half dozen of the same gorgeous Blue Point oysters I had at the restaurant, a few Wianno and Choptank oysters, and an oyster knife. Emphasis on the fact that it was an oyster knife. This excellent blog post on the subject of eating oysters at home assures me that any other knife makes the task of shucking even more dangerous than it already is (especially if you’re me, apparently. After hearing the sounds of swearing and stabbing coming from the kitchen, my boyfriend came in, picked up the knife, popped the hinge and had the stupid things open in no time. It is possible to be oyster savant, and I am definitely not, but maybe you are!).

DSC_0002

I picked up a dozen total, a half dozen for each of us, which was plenty for an evening treat. They went into a bowl covered with a damp towel and right into the fridge when I got home from the supermarket. Apparently these will keep that way for a few days, but who could look at them for a few DAYS without succumbing and eating them? We couldn’t and these were devoured a few hours after they came home.

The best shaped dish I had for creating a bed of ice for these to sit on was a pie plate. So, into the pie plate they went! Our fridge doesn’t crush ice, but that’s okay, because I do :). I tossed a bunch of cubes into a freezer bag, wrapped the bag in towels, put the wrapped bag onto a wooden cutting board (to protect the counter), and beat the whole thing with a hammer until crushed.

Shucking is the biggest challenge of this whole endeavor, and I can’t possibly explain it better than the people over at Legal Sea Foods. Although, I have to warn, they make it look very easy but it does take some force.

DSC_0011

Lemon Bars

It seems that lemon bars are everywhere on the internet lately. I spotted them here, and a key lime variant here. A commentor even made mention of my beloved Smitten Kitchen’s adaptation of Ina Garten’s famed lemon bar recipe. Had enough yet? We’re not done. I agree that our taste buds need a jolt this time of year to get through this period of wintertime blues, so I’m throwing my hat in the ring as well.

I found this recipe about a year ago in Cooking Light magazine and have yet to taste it’s equal. Never say never, but using less sugar and cutting calories in the shortbread bottom makes for a delightfully light, tart bar, with a crisp cookie crust. I whipped these up using Meyer lemons I found at Trader Joe’s last week while stocking up on my tomato sauce and beef winter staples.

Baker’s Note: I omitted the toasted pine nuts in the recipe, lovely as they sound, because they are a bit more expensive than I wanted this batch to be. I’ve substituted almonds in the past, but wanted to see if this could be made nut-free for potentially serving to people with allergies. To make up for it, I used a cup of lightly spooned flour, stead of 3/4 of a cup. Worked like a charm.

This came out so well, that I think I’ll whip up another batch to bring to work for Valentine’s Day!

Homemade Pizza: Way More Fun Than Delivery

DSC_0361

Ordering a pizza is easy, but making your own is almost as easy and really fun. Plus, there’s no limit to toppings you can put on, just wander the aisles of the supermarket and grab whatever makes you happy to top your pizza with. Even the boyfriend (who NEVER cooks) likes to get involved with this one. That way he can ensure that no less than 3 pounds of cheese gets on there, even though I insist to him that the dough won’t cook properly if the crust is over-cheesed or over-sauced. To combat his enthusiasm, I prebake the crust for about 5-8 minutes on the bottom rack. This recipe is for a thinner crust (shown in this post), but I’m working on creating a recipe for deep dish that’s like pizza made on a loaf of foccacia. That will follow soon!

DSC_0311
(Mix a packet of yeast with warm water and sugar and let it sit for 10 minutes.)

DSC_0321
(Flour and spices get mixed in a bowl while the yeast preps.)

DSC_0325
(Pour the now foamy liquid into the flour and blend to make a ball of dough.)

DSC_0331
(Cover tightly and let rest for an hour until the dough has doubled in size.)

DSC_0329
(While the dough rises, remove a sausage or two from the casing and cook in a pan until browned.)

DSC_0328

DSC_0333
(When the dough is risen, spread it out onto a olive oiled cookie sheet with olive oiled hands, because it will be sticky!)

DSC_0349

DSC_0353
(Prebake and top if you plan to use a lot of toppings, or just top and bake on the bottom rack for 15 minutes. It is done when the crust is browned lightly. At this point, remove it from the oven, slice it up, and devour!)

Weeknight Pierogies

DSC_0299
(Beer makes an awesome pairing with this meal. And really every other meal, let’s be honest.)

Good pre-made pierogies paired with fresh made dipping sauces make this a quick and delicious weeknight dinner. You eat it with your hands (enabling you to shovel food in at the fastest possible rate after undoubtably being hungry for the last few hours of the work day and for the entire commute home). It’s served family style in a big golden doughy pile in the middle of the table, so you can make enough for two or for ten using the same steps. There’s something homey and nice about everyone reaching over each other to plunge hot, potato-filled pockets in warm melted butter and refreshing sour cream with just-clipped chives.

DSC_0267
(Start with a package of good quality pierogies. I found these made by Severino at Whole Foods.)

DSC_0272

DSC_0273
(Throw these in a pan with a pat of butter and cook until browned. Make sure to turn at least once.)

DSC_0281

DSC_0280
(Chop up fresh chives. They’re crazy easy to grow so I keep a live plant in the house for cooking purposes. It literally just looks like a planter of grass.)

DSC_0284
(Add the handful of chopped chives to a generous dollop of sour cream in a small bowl.)

DSC_0290
(Put about 2 tablespoons of salted butter in a bowl and microwave for 15 seconds until melted.)

DSC_0291
(Watch the butter like a hawk when it’s in the microwave to avoid boil over.)

DSC_0307
(Plate the pierogies and arrange everything on the table.)

DSC_0302
(The boyfriend could not wait until I was done taking pictures to eat one. I captured the crime taking place.)

A Few Days in Seattle, WA

DSC_0151

I recently took a trip to Seattle and was pleasantly surprised by what I found. First of all, just to get this out of the way, it really is that rainy and weather-y as my overcast photos attest. I’m told that the summertime is beautiful and crisp, but my east coast self got rained on a few times while I was there.

Seattle appealed to me because it is a fairly large and metropolitan city (this is the part that surprised me, not that I expected cabins in the woods, but I was taken aback by the soaring heights and architecturally unique towers). The people walking around downtown were chic and in-a-rush. Totally different than my granola expectations. The waterfront area was expectedly crawling with tourists, but not the way Manhattan is and with a different kind of tourist (presumably the west coast kind), who were less pushy with their camera and stroller. Pleasant.

It was one of the most unique waterfront districts I’ve ever seen, with an uncontrived high/low mix of businesses (and people, Seattle has plenty of homeless people). You get the feeling that businesses open up on the waterfront during different times of prosperity in the district and just stay open for business even when times change. Thus, the interesting and refreshing mix.

My exploration of the waterfront district is chronicled below. There were more nooks and crannies then I could possibly explore, so this is my unique experience through the narrow streets.

DSC_0154

Driven by hunger and in pursuit of food, I set off from my hotel downtown for a brisk 10 minute walk toward the water. I happened upon this pedestrian only alley and since I, of course, can never resist a tiny alley (and lights!), I turned in for a meander.

DSC_0119

I almost immediately saw Pike Place Chowder, but what really caught my eye were the bowls of thick creamy chowder and HUGE crab and lobster rolls on the tables of the casual diners already there. I’m telling you, they don’t make the crab rolls this big back east. Or at least I haven’t found them yet, somebody please let me know if I’m missing out…

DSC_0118

The lemony and crunchy with celery crab roll was slung onto a tray with a piece of extra-sourdough bread wrapped in a bit of plastic. The hot soup was ladled, also slung onto the tray and then the whole thing bumped down onto the counter in front of me. I sat along a diner style bar close to the huge windows and ate the super fresh and really well prepared seafood.

DSC_0124

Completely overstuffed, I staggered out of the restaurant and down the street to encounter a booming permanent farmer’s market. It was teeming with tourists, locals, vendors, restaurants, shops, and pretty much everything else that could be cramped into a few crazy hilly, cobblestone streets (and frequently stairs).

DSC_0122

DSC_0121

This is a salmon city. It’s on every menu and for sale all over the waterfront farmer’s market.

DSC_0120

DSC_0127

DSC_0126

There is a full wildflower garden planted in what appears to be the gutters encircling the rooftops of the busy central area of the market.

DSC_0134

Ducking into a tiny alley between shops brought me outside to a sky high terrace at the top of a long flight of stairs.

DSC_0130

There are stairs and secret streets all over the waterfront district. I barely saw these curving steps out of the corner of my eye and slipped down on the narrow street below.

DSC_0137

At the bottom of the steps and under a dark pedestrian overpass, I stumbled across this crowd sourced bubblegum art all over the walls, cobblestone street, store signs, and pretty much every surface available. A uniform ombre effect is achieved in this piece of spontaneous street art by the varying heights of the individual gum chewing contributors.

DSC_0138

DSC_0142

Staggering down the steepest cobblestone street ever brought me down to sea level. Where the street flattens out, the highway system streams overhead and the greenery drapes past the edge of the overpass to create an unexpected tunnel of plant life leading to the pier.

DSC_0150

A stormy sky loomed over an electric purple ferris wheel down by the water.

DSC_0152

DSC_0155

As nighttime fell (and the cold came along with it) I was not unwillingly driven inside Maxmilien’s. It’s warmly lit and has the best chocolate cake ever. The fantastic views of the lit up waterfront pier and Mt. Rainier in the distance don’t hurt either.

DSC_0158This is the perfect chocolaty nightcap to a very successful wandering.

Gourmet Mac and Cheese

DSC_0084

A few cold days and I’m reaching for the warm throw blankets by the sofa and craving comfort food hot out of the oven. The same oven, I might add, that a few weeks ago the weather was so hot that I wouldn’t have turned on to cook with if it was the only thing standing between me and starvation. However, this week is a different story. How quickly things change…

Every restaurant and its mom has put out a mac and cheese dish within the last few years. Comfort food has been officially converted to high end dining and is EVERYWHERE. While delicious everywhere I try it, mac and cheese is one of those things that I can make just as delicious and gourmet at home. There are PLENTY of dishes that I can’t do this with, so those are the dishes I choose when I’m out. For instance, I’m too scared to cook lobster, so I order it at a great restaurant and have an awesome dining experience that I can’t create in my own kitchen.

This gourmet mac and cheese recipe tastes just like it came from your favorite southern foodie restaurant and comes right out of your own oven. Which means you can eat it on your own sofa, in front of your own movie, just like comfort food should be eaten 🙂 My favorite kind of dinner and a movie.

DSC_0050
(milk is simmered with onions and spices and then strained for a smooth creamy base in which to melt the cheese)

DSC_0064
(Gruyere and soft fontina shredded up and melted in warm milk make up the cheesy sauce)

DSC_0078
(I use a generous amount of bread crumb topping to create a even more complex flavor, you’ll see why when you read what goes into the topping in the recipe)

DSC_0070
(pop this under the broiler, wait 2 minutes, then enjoy!)